Showing posts with label gardening. Show all posts

Sunday, August 4, 2013

Where I build a worm house

To further my goal of going organic in my food choices, I decided I needed another way to make good quality compost to increase the fertility of my raised beds. Better soil, better vegetables.

My sister, Amanda, mentioned worm composting and I took the idea and ran with it. I shopped the Internet for vermicomposting products and watched a couple of YouTube videos on how to build your own. Such a decision, spend roughly $100 for a Worm Factory that is uniform, tidy, & streamline or spend less than $20 for homemade and risk something Clampet-like.

I found a website www.findworms.com and used it to find a local worm farmer. I contacted her this past Wednesday and found out she was going to be at the Bow Little Market (www.bowlittlemarket.wordpress.com) the very next afternoon. Visiting with her on the phone convinced me that I could easily make a good home for my worms without a large cash outlay. $80 savings for building instead of buying will free up just that much more of the budget for organic, non-GMO foods!

I bought a one pound tub of Red Wiggler worms that was estimated to be 4,000 worms. They cost $25.00.

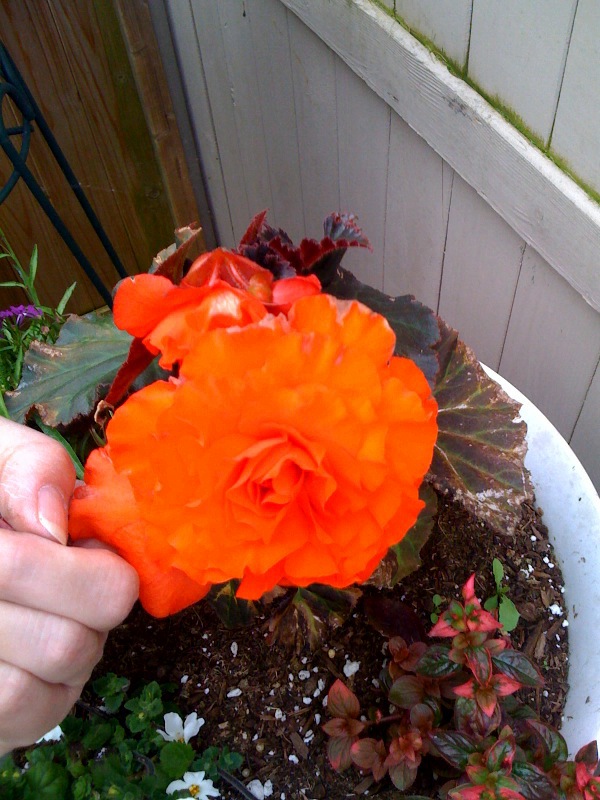
Here you can see the aging flower petals and the squash blossom of off a small zucchini. I have read that squash and melons are a favorite dinner for the worms.

This is how I built my vermicomposting bin after watching several You Tube videos. It seemed good advice to use a sturdy container over a cheap one. So I decided on two Rubbermaid Toughneck 10 gallon tubs with lids. They were $5.97 each. I also purchased a half yard of fine black tulle. Add to the tally $.67.

The tubs will be stacked inside each other. The outer one left intact to catch the worm tea. The inner one will be altered to have 1/8" holes in the bottom to allow the worm tea to drain off, and 1-1/4" holes to provide air circulation to ensure aerobic conditions for the health of the worms and to prevent smelly anaerobic composting. The fine tulle is used to cover the vent holes, to prevent the worms from exiting and fruit flies from entering.

I decided I wanted a deeper worm tea catchment area, so i added wood blocks inside the handle to adjust the depth that the top bin would stack into the bottom bin.

 Fortunately there were two holes in the bottom of each handle, all I had to do to attach the wood blocks was to add a couple of screws.

Then I used an 1-1/4 hole saw to make the vent holes. A 1-1/4 spade bit could have also worked.


Then the drain holes. I used a 1/8" bit and drilled several holes in the lowest portion of the bottom.
Here you can see the holes as the container is held up to the light. The holes look a lot bigger in the picture than they really are.


To cover the vents, I used a triple layer of the black tulle and a hot glue gun. I found it worked best to lay down a ring of hot glue around the holes, imbed the tulle layers into the glue, then top with another ring to ensure a tight seal. I did this on the inside if the container to keep the exterior tidy looking.

Before laying down the hot glue, I used the hand sander to rough up the area around the holes to help the glue get a good hold on the smooth plastic.

I trimmed the excess tulle as close to the glue ring as I could. I figured it would keep compost from getting caught in them when I empty the bin.

Now to feed the worms. I added shredded paper. I was going to shred newspapers but I discovered my shred bin was already full of paper shreds, so I just used that.


I wetted down the paper by sprinkling handles of water then stirring with my hands till they were uniformly wet, but not drippy. 

Then I layers in the greens. I had very little veggies trimmings as I haven't cooked dinner in a few days, but I did find some cherries that were getting moldy in the fruit drawer. I added some cut up flowers from an old cut arrangement and bulked up the fresh greens with handfuls of torn up horsetails from my yard.

Last of all, I added the worms.


Here's a close up of my little workers:


So, here is the finished product. I placed it in a spot on the back deck that is always shaded and will be sheltered from the rain.


So, how much did this cost? $37.61. And it was completed in just an evening!

I've read that a pound of worms will eat a half pound of produce scraps a day! So I will be adding new veggie matter everyday, as well as a handful of my garden soil to introduce the soil bacteria and provide grit for the worms' gizzards. I've also been saving my eggshells and I will be grinding mine up in a blender and giving it to the worms for added grit and to boost the calcium content of my soil after the finished compost is used to amend the soil in my raised bed gardens. 

I will need to protect the worms from freezing so I intend on bringing my worm farm into the garage this winter. If done properly, balancing carbon and nitrogen, brown and green, it is supposedly odor-free.


Monday, October 24, 2011

Final Harvest Before the First Frost

The expert weather prognosticators are calling for the first frost tonight. So I took a couple of hours this sunny afternoon to continue my garden beds clean-up and brought in the last of the produce.

I found 2 medium zuchinni, 2 oversized cucumbers, three handsful of greenbeans pods for drying (to save the seeds), 2-1/2 cups of unripen cherry tomatoes, a trayful of green roma tomatoes, a bouquet of yellow zinnias and orange ganzia flowers, and a small windowbox of fresh baby salad greens.


Hiding in the branches of the species dogwood tree in the corner of the backyard hangs a hardy non-stop begonia. Long after the lobelia and brachicomb had withered away, this plant is still going strong. I will be curious to find out if the frost finds it hanging in the tree.

Yesterday, I cut the last of the roses. Although, they are all loaded with buds, I have my doubts they will have a chance at blooming. I will savor the fragrance of these beauties sitting above my kitchen sink.

Thursday, September 8, 2011

A quick peek into a my garden this morning. I tiptoed outside in my robe to capture these pictures on my phone and was surprised by the joyful sensation of cold morning dew covered grass on my bare feet that made me feel like a little girl again!

My shady corner within the spa enclosure.
The three baskets have grown together into one floral mass and the fushias continue to bloom, bloom, bloom!

I was pleased to note the smell of lots of flowers still lingers. The nights may be lengthening and getting pretty cool but it still looks like summer in the yard. I've been really good about watering and fertilizing my pots and baskets this year so they have repaid me in millions of blooms this year. The pots in front of the garage door have also grown into a solid mass of green and mixed blooms. The long boxes of African Daisies along the front walk have taken over the area under the livingroom window, and the front porch pots have never been so lush-you have to push through just to get to the door!

Green beans peeking through the lattace of the privacy screen.
With the faith of a child our toddler planted a seed.
I took a quick look around the back yard this morning as it's been several days since I've been outside to look at my gardens. I've been working in the kitchen lately, putting up the harvest. Yesterday's labor of love included 18 quarts and 9 nine pints of nectarines and they join the 10 quarts of Aizian-style Plum Sauce made the day before.

Now I'm heading back into the kitchen to process more Italian Prune Plums before heading to eastern Washington today to visit my sister in Carlton and help bring in the honey harvest. My daughters are joining us this year. It's going to be alot of fun!

Saturday, July 2, 2011

Daybreak in the Garden

Couldn't sleep at all last night, perhaps it was that I am soooo excited about my sister's upcoming visit!

First hummingbird at the bedroom window feeder: 4:49am.

Outside to greet the day: 6am, after coffee and a bagel

Here's the view as I stepped off the deck this morning:
I tried to capture the wonderful quality of the light in the clear blue sky as the sun touched the white trunks of the cottonwoods behind us but the pictures were unspectacular. Too bad this isn't an HD blog, because the colors of the flowers and the variety of green is just astonding!

Well, back outside to pick my paintbrush back up and get to work! Have a great morning!

Sunday, June 26, 2011

It's Been A Great Staycation!

Brent's vacation this year was very much a working vacation. And I have the photos to prove it!

We have been working hard to get the yard in order. Building new builds, painting the privacy screens in the back yard, planting, weeding and because it's been almost two weeks without rain, lots of watering. One of the draw backs to raised beds can be how quickly they drain and dry. At least I can dictate the amount of water each planter gets, so much better than having things drown in our clay soil.

Here's some progress pictures from around the garden:

This is the new raised bed that runs along the property line on the garage side of the house. This picture is actually more than half-way through the project. The worst part of the job was removing the long overgrown bed that was there. Eighteen years ago we used cherry timbers to make raised beds, which had long since decayed. The bed was horribly overgrown with blackberries, lemon balm and oregano and several roses that had returned to their wild root-stock. The roots were so solid in that area that it was a huge effort to escavate and re-level the bed. To say nothing of hauling it all away!

Here Brent lies in exhaustion! Hahaha. The bed is straight, level and lined with a double layer of landscape cloth in hopes of delaying the re-appearance of horsetail ferns and blackberries!

Hey, men who have died of exhaustion aren't supposed to be laughing!

Here's the bed about 8pm last night, with some of the plantings completed. Here you can see the Welcome-To-My-Garden Arbor along with the Wintercreeper or Emerald Gaiety Euonymus bush we planted at the start of the raised bed so we have year-around interest with a varigated evergreen.

A better view of the Evergreen Climatis and the Purple Leaf Honeysuckle I planted and wove into the arbor's lattice. On the opposite side I've woven a pink jasmine and a clematis start from Reen.

One of the seven 8 foot-long bed sections is devoted to berries. Amanda gave me an early birthday present of 3 blueberry bushes-already loaded with blueberries! And we planted 22 strawberry plants, too. Those were my gift to my DearHusband. Strawberries are his favorite!
This is a reverse view (looking towards the street). In this picture you can see one of the three fuschia-pink lupines along with a veggie section of the bed. I have 5 fennel starts, a yellow straight neck squash, a Black Beauty Zuchinni, 2 varieties of cucumbers and a clump of 5 pole bean starts. In the center, I've planted 5 little root sections of Jerusalem Arthichokes or Sunchokes. I've never eaten them before but they sounded interesting.


Adding more plants to this section is on today's list. In the corner you can see a Niko Blue Hydrangea. This shady corner is a wonderful little spot. It doesn't show in this picture but just to the right of the chair is a basket hanging from the tree that is overflowing with deep red begonia and a sunny yellow tailing flower.

This is the garage wall raised bed, looking towards the arbor. I think these sunflowers along the wall grew 3" yesterday! The two cilantro divisions have just expoded with growth and the color spots are making quite a show.

Now a couple of random shots to share:


Two days of Brent's vacation were spent cleaning out the shade garden which had become overrun with vining maple,  horsetails, creeping buttercup and of course, blackberries. Now the area has been re-graded away from the foundation and covered with beauty bark over a double layer of landscape cloth. Perhaps next year we will re-landscape this area.
Hey, Sisters, remember that trampled-flat broken-off section of Wandering Jew? Well, I stuck it into a pot of soil and it is taking off! New roots, new leaves!

Also in this shot are the Hebe starts that I intend for my Faerie Garden planter. That also is still on my To-Do List.

Time to don sunscreen and head back outside to enjoy some sunshine on Brent's last day of vacation. I could really get used to having my hubby home full-time. I'm gonna miss having him around every day, but I'm sure he's probably looking forward to getting back to paying work to have a breather from yardwork!

Tuesday, June 14, 2011

I'll Make My Own Sunshine Then...

A peek out my kitchen window
The skies may be overcast again and the breeze gaining on wind status but I have a spot of sunshine to call my own!

This is the shady corner within the privacy screen around the hot tub. My begonia pots are in full bloom and starting to look lush. On the deck you can see my 2 Boxwood Basil, the tall African Basil, and the Rubin Basil. In the very back is the World's Smallest Fushia just starting it's first blooms, as well as a pair of dainty flowered Electric Lights Fuschias.

A close-up of The World's Smallest Fuschia blossoms
You can also see the top blooms of my Multi Blue Clematis poking through the lattice at the top of the privacy screen.

The first huge bloosom on my dark orange Non Stop Begonia.

This picture is from last week. This plant has added another four huge blooms since I took this picture (as you can see in the top picture).

Monday, May 23, 2011

Sunday project

We may not have had much sunshine, but at least it wasn't raining! And the sun did actually come out in the late afternoon, when these photos were taken.

Brent and Aizia, along with Dad's supervision, started my newest raised garden bed. This will be a mostly shade garden, as it won't get sun until late in the afternoon. I cannot wait to get some soil into it and start planting!

 Here Aizia spreads the all-important landscape cloth or weed-block fabric to the bottom of the bed. We do this in a vain effort to keep out the horsetails. At least it does help for a few years.

 And the untreated sidewalls go up.

After the boxes are completed. The bare wood is lined in heavy mil plastic to protect the wood from soil exposure. It'll buy us a few extra years of life for the wood, without having to resort to treated wood.

First into the new bed will be a division of the Dicentra, or Bleeding Heart, from the corner of the bed directly behind Aizia in this picture. It was transplanted from my sister's garden last year and has just gotten huge! You can see it above her head in this picture.

Next into the bed will be these clumps of fern. They were dug out from behind the steps seen here (before they were rebuilt with solid risers) and spent last summer flourishing despite the fact their root balls were exposed.

I think I will also add some cutting flowers to enjoy in the house, seeing as I still have a flat of Snap Dragons and mixed Zinnias to plant!

Monday, October 25, 2010

October begonias

Just a quick post before I run out the door this morning. This is what I saw peeking out my kitchen window this morning to see what the weather is like.


What a nice surprise! Begonias in October! I gues when they say "Non Stop Begonias", they really mean it.
Oh, and the grass-let's just say it's ornamental and supposed to be there!

And if you peek into the bottom right hand corner, you'll see my tiny fairy sized fushia is still in bloom. I am planning on bringing it indoors as a houseplant, but not until I can do a thorough bug inspection!

Tuesday, May 11, 2010

A work in progress...

Everyone has been asking for pictures of our backyard progress. Today, I planted the new raised bed planter that wraps around the deck.  I still have room to add 3 Spanish Lavendars and something else that's evergreen, one at each end next to the stairs. The bed is interspersed with flowers (bright yellow marigolds, purple petunias, vintage red stock, mixed cosmos, mixed snapdragons, purple giant empress salvia, lupine, Mama's double burgandy peony, a Kleims Hardy Gardenia, assorted oriental lilies, acidanthera) and vegetables (broccoli, cauliflower, carrots, radishes, garlic, walla walla sweet onions).  The area in the background in this shot hasn't  been worked yet. I still need to repaint and relocate the fireplace. Relocate the compost bins-which are now empty. You can also see the end of the shed that my potting bench is attached to.


This is the backside of the raised bed surrounding the propane tank. You can see the access path between the hostas. The hostas were brought over this evening (by our neighbor across the street), just as we had finished planting a couple of items in the front side of this bed. I have plenty of room to transplant some tiny ferns from under the deck stairs into the corners behind the hostas. Lots of planting room left. Hmmm, time to go shopping!

From this angle you can see the front of the bed wrapping around the propane tank. In the center is a pink dogwood tree. It is in it's own seperate box within the bed to protect it from overwatering. On each end is a Snowmound Spirea that will have tiny white flowers soon and the labels promise vibrant red foliage in the fall. Between the tree and the Spireas is where my rhubarb divisions will be replanted amid the compost from my bins. I will plant a line of cosmos along the back behind the rhubarb to help hide the tank. Lots of room along the front the bed for colorful annuals. Eventually the ground will be covered with landscaping material and then beauty bark between the beds which will line the perimeter of our property line and along the front of the deck bed.
And, just this evenng, DearHusband has decided we can build a 2 foot high framed lattice screen that we can put between the plants and the propane tank to further hide the tank. The giant pot you can see behind the tank has my Multi Blue Clematis that I plan on putting to the right of the Spirea in the foreground and train up over the top of the tank. I am hoping to get two divisions from the clematis so I'll have one on each end of the tank.

Phew, it was a busy day in the garden. I was blessed with bright sun to warm me and just enough of a breeze to keep me cool. The weather promises to be great again tomorrow!

Thursday, May 6, 2010

Real Women drive trucks!

This is the picture text I sent my daughters on Monday afternoon:

Real women can drive their own trucks to get garden soil, mulch, and haul the trailer to the dump! I bought myself a truck today! I hear 1988 is a good year. (The year DaugherA was born!)


 It's kinda silly how exited I am to have the means to pull my trailer again! Its been a few years since we got rid of the 'man van' and our only trailer-hitch vehicle.


Wednesday, I took my truck to Walmart to make it's first haul: A pink dogwood tree (Cornus Florida-Cherokee Chief), 2 5-gallon Spirea (Snowmound), 2 1-gallon Spirea (Snowmound), and 6 12x12x2 cement pads for the backyard fireplace.

I went to Walmart because I had seen that they had Dwarf Alberta Spruce in a one gallon pot for $7. However, on closer examination the spruce were not in good shape, they had been badly pruned and had many a bald spots.  But I did see some plants that were very heatlthy looking. The Spirea was healthly looking, not pot bound, and full of buds. I got the large ones to go into the new raised beds in front of the propane tank in the back yard. They will have small white flowers and striking red foliage in the fall. I was thinking I'd put the smaller ones in the raised beds along the deck but realizing they will grow into 4'x4' mounds, they will be too big for the space. Maybe I'll add them to the planting beds in front of the picket fence in the front yard.

I couldn't resist the Pink Dogwood. My favorite tree! I have on that is front and center in the picket fence bed, but it's a variety that leafs out, the blossoms start out as green and don't turn their rosey red color until mid June. This new tree is in flower with very few leaves yet. It will be front and center in the new bed!

Pictures of the new raised beds will follow soon, as soon as I have them planted with all my plants and flowers.


.

Tuesday, April 20, 2010

Time For Spring Baskets!

Sshhhh, don’t anyone tell my Elantra sedan that it’s not a pick up truck! I hauled home more flowers today than I ever have before in one trip!


Back seats folded down to hold four 12” hanging baskets, the front passenger seat and truck full of flats!


This post may well bore anyone who isn’t a gardener. I know my DearHusband’s eyes glazed over when I was telling him all of what I bought, name of flowers and quantities, what will go where. Remember the “blah blah blah blah…” sound the kids from Peanuts heard when their teacher or any adult spoke? Yeah, I think that’s what he was hearing as he watched my mouth moving.

Seeing as I have been using this blog to remember what I do from year to year in the garden, I am going to detail my purchases today. Feel free to yawn and look bored, if so inclined.

For my window boxes, deck planters and pots for the front walk I bought (in order of importance):

1 flat of 4 packs (48 plants) “Midnight Dreams” Petunias - fragrant dark purple


1 flat of jumbo 6-packs (36 plants) “Vintage Red” Stock - I especially love to put this in the back row of my window boxes so I can enjoy their spicy clove scent.


1 flat of jumbo 6-packs (36 plants) of Red Verbena


1 flat of 2.5” pots (32 plants) of White Bucopa to trail over the edges of the pots


1 flat of jumbo 6-packs (36 plants) of “Regata Mix” Trailing Lobelia


1 flat of 4-packs (48 plants) of Yellow Marigolds


And 20 Zonal Geraniums of assorted colors for the center of each pot or window box.


For landscaping use I also bought:

1 flat of 4” pots (18 plants) of “Giant Purple Empress” Salvia - hummingbirds love this plant!


1 flat of jumbo 6-packs (36 plants) of Ganzia in assorted colors. I’ve actually had this ‘annual’ come back for a second year!


I also bought two 4” pots of “Jack Be Little” pumpkin starts. One pot has 3 young starts and one pot has 4 starts. I am thinking of training these to climb up the two (accidentally dwarfed) flowering cherry trees in the front yard. Won’t it be fun to see mini pumpkins hanging from a tree?!


I have been going to this nursery for 15 springs now (I have watched their children go from riding their Big Wheels through the greenhouses to the oldest now holding her own sweet baby). I have always bought their 12” mocha colored pots that are nice and deep with lots of room for root growth but I didn’t like the color and plant combinations this year so I bought the more shallow 12” pulp pots. It looks like the are trying something new as these pots were labeled with “Inspired by Design” tags that listed the plants in the pots. I saw 6 differently titled baskets and I think I showed considerable restraint on only bringing home four.

For the front porch I picked out a basket titled Blueberry Sorbet. It has Blue Petunia with Dark Blue Vein, Dark Blue Petunia, Lavender Verbena and White Bucopa.


Between the front bedroom windows hangs Raspberry Sorbet: Pink Petunia, Dark Fuschia Petunia, Dark Fuschia Verbena and White Bocopa.

On the far end of the back deck I hung up Jazzy: Supertunia Raspberry Blast, Deep Burgandy Verbena and Lime Ipomoea (Sweet Potato Vine).


In the coveted position in front of the immobile side of the dining room sliding glass door is Blue Ribbon: Dark Blue Petunia (so they say, I call it a dark purple-my favorite), Petunia Glow in Lavender Shades, Light Blue Lobelia and Lavender Calebrochoa. This is where I put my favorite basket as it’s the one I look at all day long when I’m in the house. It is easily viewable from living room, dining room and kitchen.

Keeping my fingers crossed for a rain-less day tomorrow so I get busy potting these beauties!